veganism.social is one of the many independent Mastodon servers you can use to participate in the fediverse.
Veganism Social is a welcoming space on the internet for vegans to connect and engage with the broader decentralized social media community.

Administered by:

Server stats:

47
active users

#morsecode

1 post1 participant0 posts today

Did my first cw contest today ( i was working in the SO LP SSB/CW group). Since it was a local 80m 2hour contest i didnt expect a pile up on cw and I sure did get one. Normally when practicing pileups in morse runner, I tend to single out station by prefix but..... since all the stations were S5 stations that wasnt a option and boy did I get my butt kicked but hey you get on air to get better.

52 ssb qso's
38 cw qso's

But hey my temp. 80m dipole works well hehe

I was in the shack and was notified that @N4JAW was on, but regrettably couldn't hear him. I did hear some peeps sending "CQ MST" — had to look that up, but it's what I would have thought it was. (I do SST regularly.)

Cranked-up the keyer WPM to 20, and logged one right at the end of the hour. But yeah, 20 WPM is a stretch for me.

Look at this gorgeous 3d-printed iambic #MorseCode key! Definitely looks like you'd only want to print it with a resin printer, but with the magnets installed, I expect it would work great with a jeweler's block base.

Open source, comes with a complete BOM from McMaster, has STEP and STL as well as the original SW files. Very nice work.

I'd use longer screws and thumb nuts to lock them (I mean, for my key I did use longer screws and thumb nuts) instead of thread locker, but that's a personal choice. 😀

github.com/Neil-Sawhney/N2-Iam

Replied in thread

If you have a local ham club with several people interested in this key, you can buy brass hardware, and with the links in the README can buy enough to make 5 keys for $50 (with a bunch left over because of different multiples, of course). I did this because I intend to make several of these keys for testing and display.

But it works fine with far cheaper stainless hardware; brass just looks nicer. As far as I can tell, most hardware stores even in the US have M3 metric hex socket screws in bins, so you don't have to buy 10-packs or 50-packs of hardware. This works perfectly fine. You just need a hex wrench and a small box-end wrench or needle nose pliers or forceps/hemostats or something to tighten the nuts when you adjust spacing.

My goal here is to help make it cheap and easy to have a really usable key.

And if you run into any problems, please please ask for help! The whole point of the beta release is to get feedback so I can improve both the models and the instructions before posting this more widely.

Replied in thread

This design is ready for you to test!

I printed out keys with six different variations on spring strength, four different sizes of covers, two different heights of swivel bases, and brought them all to my local club monthly show-and-tell. A few others club members have also printed them. I took some feedback, and have now updated the documentation and released STEP and STL files for multiple configurations.

The ones I printed were ABS. One club member printed in PLA, and another in PETG, so it looks like this design can work well across multiple types of filament. One club member screwed down what I had meant as a belt swivel mount to a board that you rest your wrist/forearm on and it's a very clever addition! Picture attached.

I would like lots of detailed feedback! If you are interested in a single-paddle morse key, it doesn't matter whether you want a very light or extremely stiff spring or anything in between, this design can meet your needs. It's not expensive. You may be able to use random hardware lying around the house, especially if you have spare parts for 3d printers, but I also have links in the documentation for various hardware you can use with it.

Lots of options and possibilities, and if you need help, please don't hesitate to speak up!

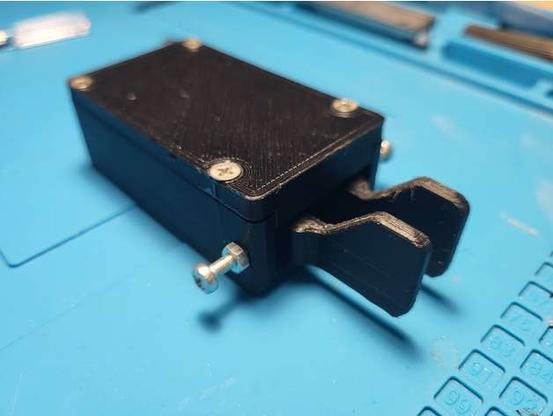
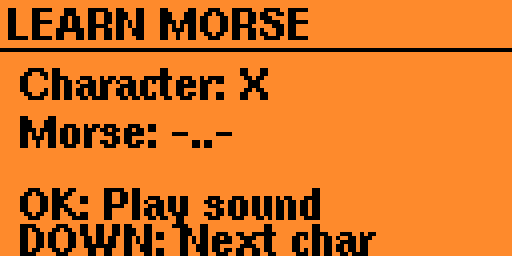
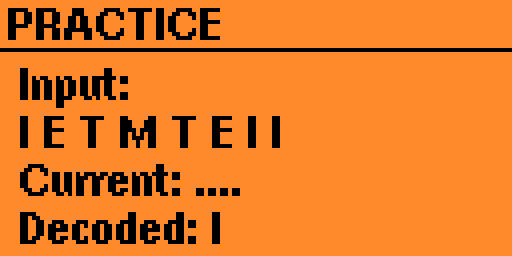
It took a month and a half to get to me, but my new Kent single-paddle morse code key kit arrived last night. It was a quick and easy build. Glad I got the kit instead of assembled, because I would have torn it apart to see how it worked if it had come assembled! ☺

After I got it adjusted, I sat down and keyed the alphabet at 20WPM, with no errors on my first use. So the feel is pretty good.

I've been comparing it to my Putikeeg (double-paddle) key, switching back and forth. I have both of them adjusted for a light touch and short throw; I can't even fit a sheet of normal printer paper between the contacts.

The magnet spring on the Putikeeg unscrews itself over time, and it doesn't take that long, because I have it set near the extreme of its travel for light touch. I'm hoping it doesn't go completely missing someday. (I think I need to put some loctite on it to make it stop falling off.) The spring tension on the Kent doesn't move, and can be adjusted separately for dit and dah.

The Putikeeg has a switch to swap sides, which is nice. The Kent doesn't have that feature, and there isn't anywhere on the base to easily add that.

If I slap the paddle too hard on the Kent, the opposite bar strikes the contact. So I can, for example, send Y or K by tapping dah hard and holding it, and L or R by tapping dit hard and holding it. Increasing the throw and tension didn't change that. But I'm not a slap-happy keyer, so I don't think it will be a problem for me.

This is the opposite problem of my 3d-printed key, where a snapping release causes the other side to touch, so if I slide my finger across dah and release it suddenly, I send N; if I slide my thumb across dit and release it suddenly, I send A.

The Putikeeg being a dual-paddle key doesn't have this problem; the sides are completely independent. (I send with the Putikeeg as if it were single-paddle, "iambic" squeezing breaks my brain.)